BuildBear private testnets: deploy your smart contracts in a private testnet
Catapulta has integrated with BuildBear to allow you to deploy your Foundry or Hardhat scripts in a private testnet / fork environment, provided by BuildBear infrastructure.
Today you can spin a private testnet or fork directly with the Catapulta CLI.
What are private testnets or forks?
Before you deploy into a production network like Ethereum Mainnet, you want to ensure your smart contracts are perfectly integrated with your frontend or backend, or test the interoperability of your application with other protocols like Aave or Uniswap.
With private testnets, you can take a snapshot of a production network into a private network for your team. In this way, you can integrate your smart contracts with other stacks of your software, check the interoperability with other protocols, and all of this in a safe and private environment without worrying about gas costs.
What BuildBear private testnets provides to your team?
BuildBear hosted environments gives to you a RPC endpoint to connect to the private testnet, a block explorer and faucets. Share the RPC endpoint in your team to collaboratively speed up your development.
You can also add the network to your Metamask wallet for frontend integrations or E2E demos.
How can you deploy to BuildBear testnets with Catapulta?
Catapulta CLI allows you to deploy your Foundry or Hardhat scripts into BuildBear private testnets, directly from the terminal, with zero RPC configs.
When you deploy to BuildBear using Catapulta, we will take care of:
- Spin a new BuildBear private testnet to the target network
- Route all your deployment to the private testnet RPC endpoint
- Verify all smart contracts within the testnet block explorer
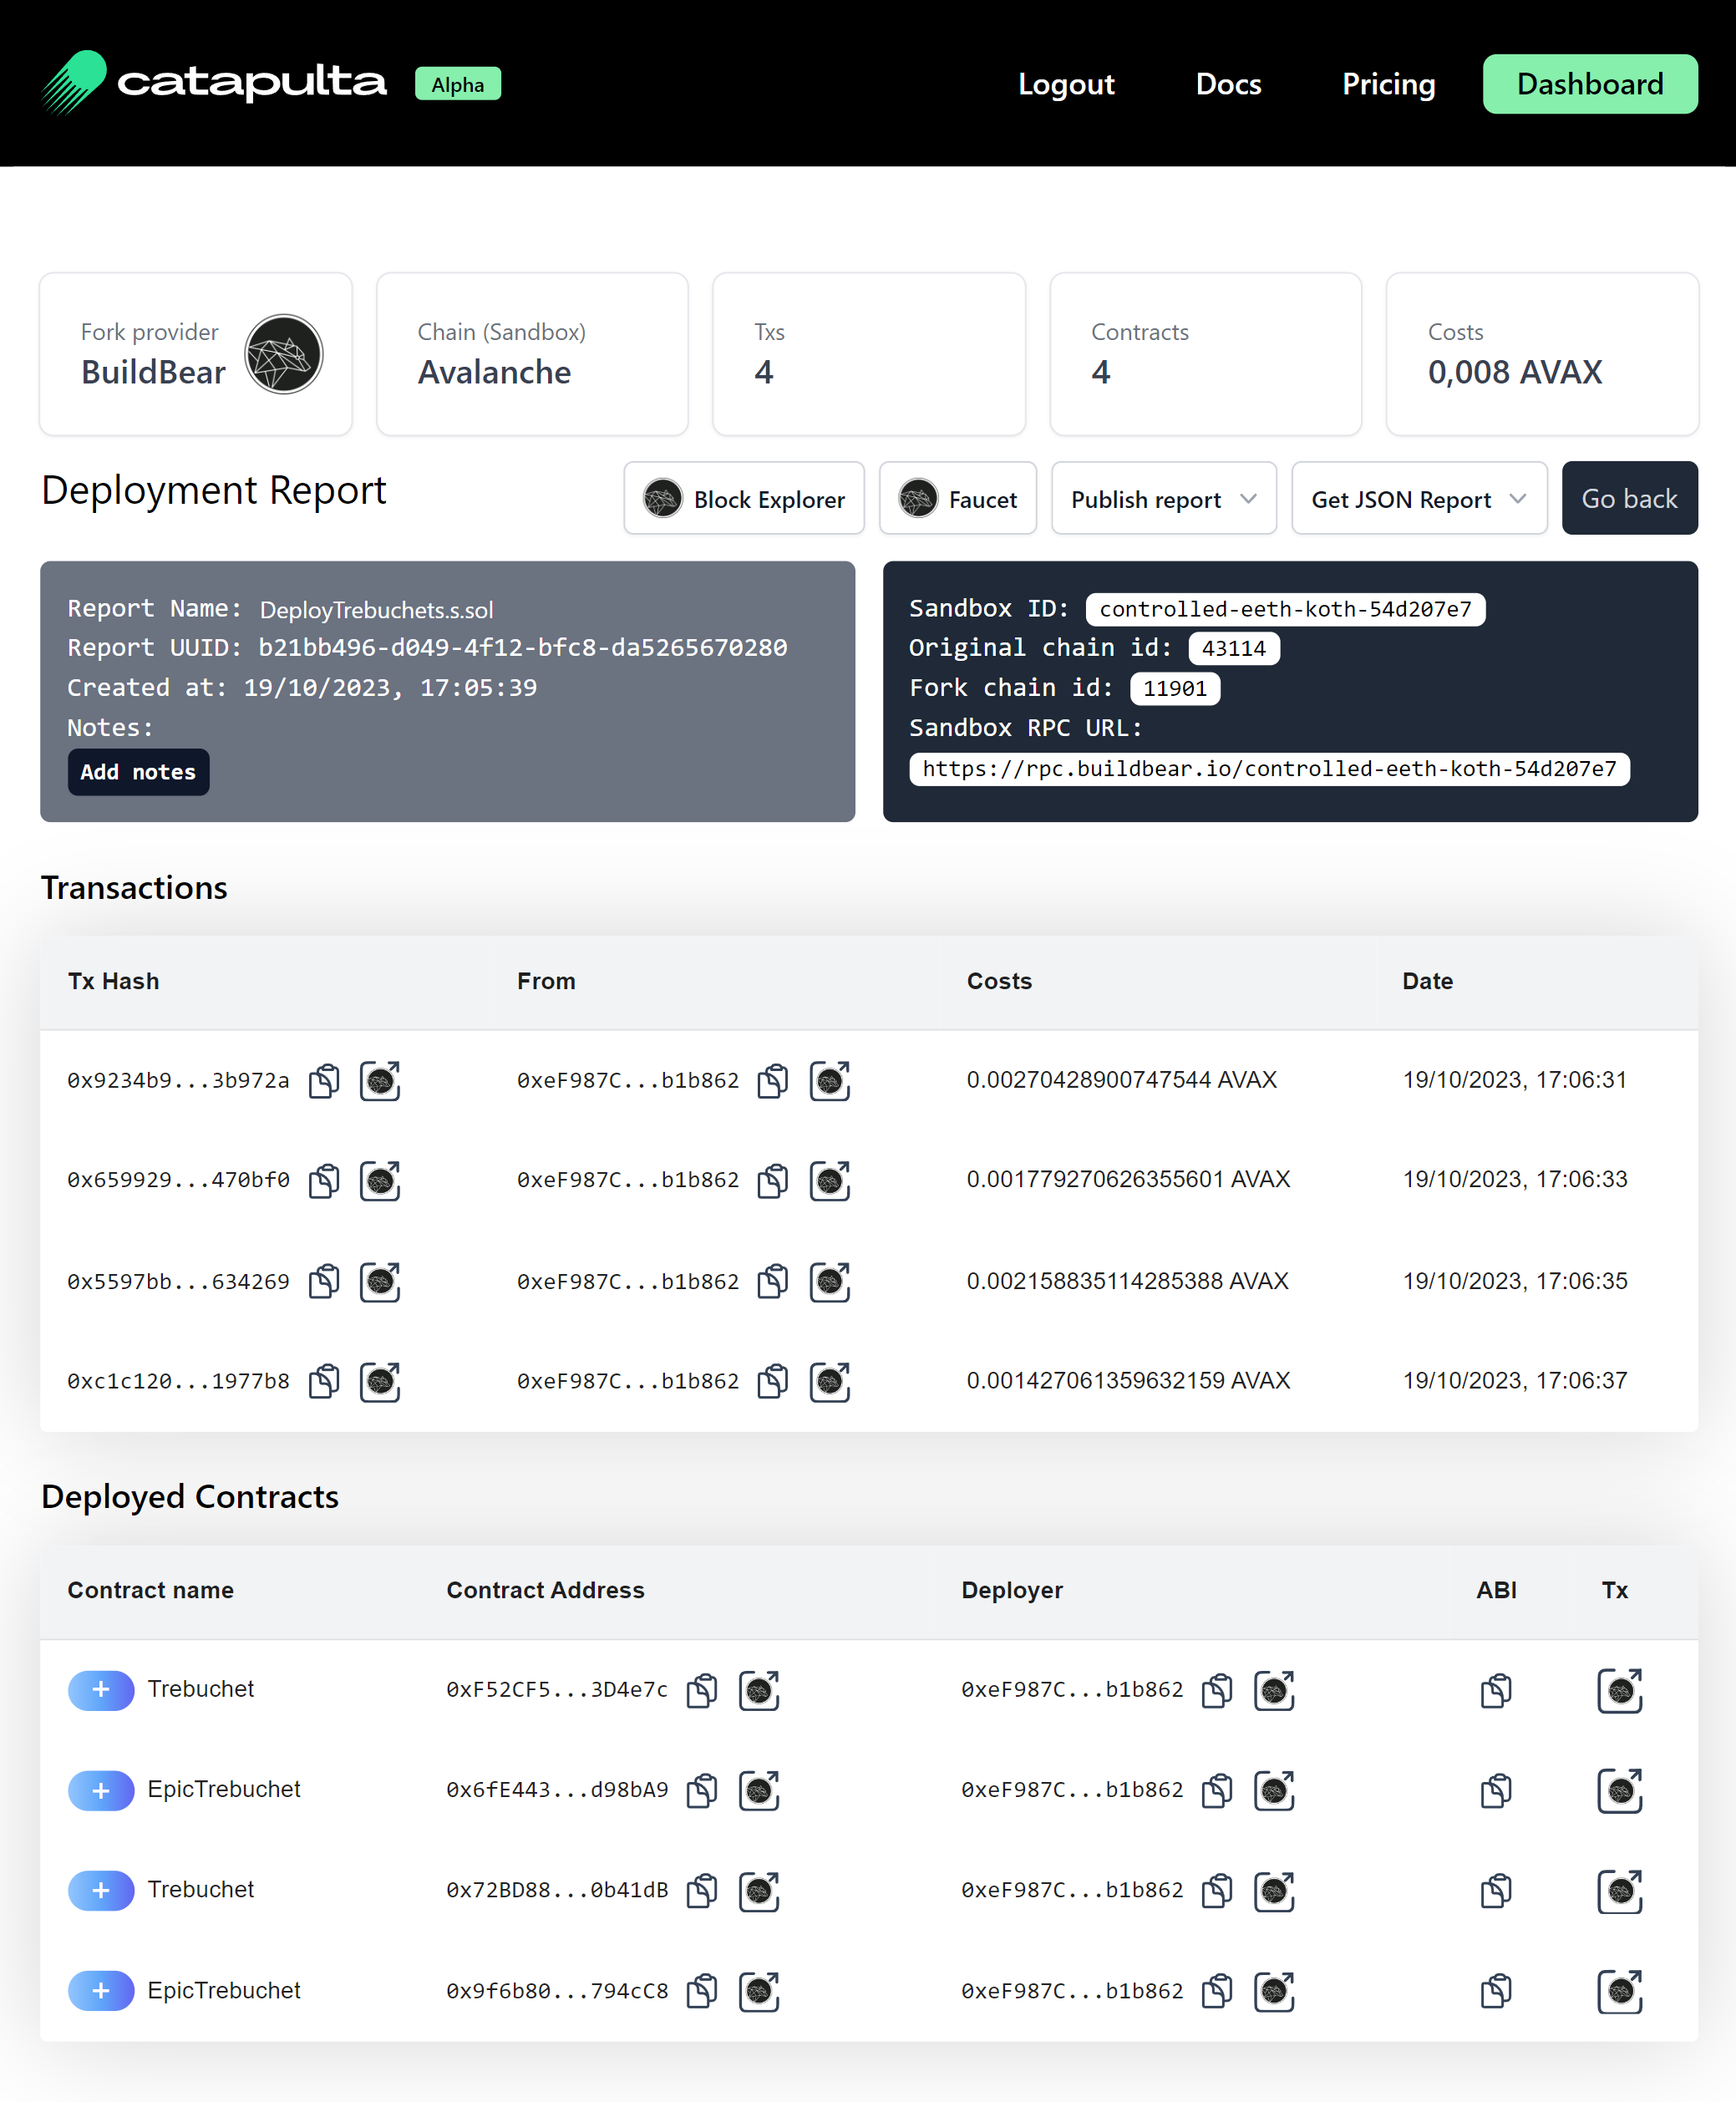
- Generate a deployment report with all the contract addresses, and all the information about your private testnet:
- Private testnet RPC endpoint
- Block explorer links at transaction and addresses
- Original and sandbox Chain ids
Setting up Catapulta and deploy into a BuildBear private testnet
First, you need to sign up at Catapulta for free, create a project to obtain your CATAPULTA_API_KEY, and save it in your dotenv .env file at the root of your project.
Depending your Solidity toolchain, you follow the steps of the Foundry or the Hardhat tutorial.
Foundry projects
You can deploy to an Optimism private testnet with the following command:
npx catapulta script scripts/Deploy.s.sol --network optimism --fork buildbear
Feel free to change the --network parameter with the network name you want to take a snapshot.
Hardhat projects
For Hardhat projects, requires a minimal 2-step setup.
Install Catapulta in your repository with npm/yarn/pnpm.
npm i --save-dev catapulta
Import the Catapulta Hardhat plugin in your hardhat.config.ts file.
This is a mandatory step, if not, Hardhat can not resolve Catapulta networks.
// Top of hardhat.config.ts/js file
import 'catapulta/hardhat';

[...]
Now Catapulta is configured in your Hardhat project.
For Hardhat Deploy scripts, you can deploy into a Optimism private testnet with the following command:
npx catapulta deploy --network optimism --fork buildbear
If you prefer to run Hardhat scripts, use the following command:
npx catapulta run scripts/deploy.ts --network optimism --fork buildbear
Conclusion
Private testnets should be added into your development workflow, due it allows you to perform E2E integrations of your smart contracts across all your stack and other protocols, in a quick and collaborative way.
BuildBear prevents you to reinvent the wheel, offering a ready to use infrastructure and a top-notch technical support for your private testnets.
Sign up with Catapulta today for free and enjoy a better Solidity development experience, with zero-config deployments, automated verifications in block explorers and deployment reports which you can share within your team.